Donnerstag, 29. Januar 2015

Tauriel traveling cloak is finished

UPDATE
I made a newer version for this tutorial on my new blog.
go check it out :) --> filmkostueme.ch/tauriel-traveling-cloak/

 -----------


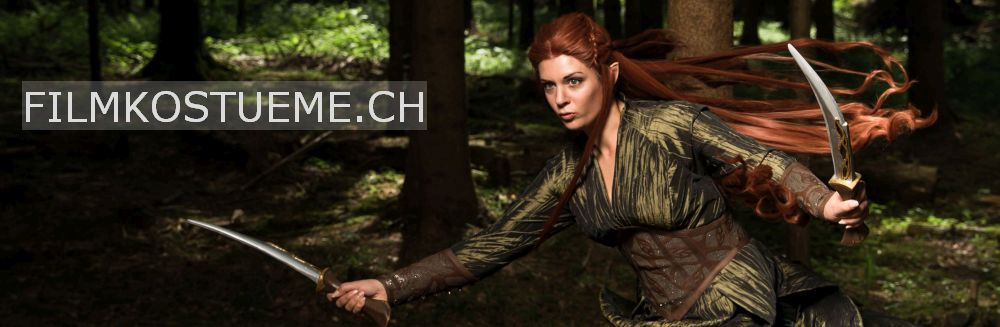
yaaaayyyy my Tauriel traveling cloak is finished and I am so freaking happy with how it turned out :D
Here are some pictures:
---------------
Juhuuuu mein Tauriel Reisemantel ist feritg und ich bin so verdammt happy mit dem Resulat :D
Hier ein paar Bilder:


Now that the cloak is done, I still have to make the leather bracers, the belt and the leggins/trousers....
And after that, I will start with Tauriels Mirkwood dress ;)
----------------
Der Mantel ist zwar jetzt fertig, was ich aber noch machen muss sind die Armschienen, der Gürtel und die Leggins/Hosen.....
Und danach werde ich mit Tauriels Mirkwood outfit starten ;)

So a lot of Tauriel stuff ahead ;)
----------------
Also noch viel Tauriel Zeugs in Aussicht ;)


Sarah

Mittwoch, 28. Januar 2015

Tauriel traveling cloak: final progress

UPDATE
I made a newer version for this tutorial on my new blog.
go check it out :) --> filmkostueme.ch/tauriel-traveling-cloak/

 -----------


Last progress steps of my traveling cloak :)
-------------
Die letzten paar Schritte meines Reisemantels :)

Finishing up the bodice lining:
-------------
Das Miederfutter fertig einnähne:


Edging the armhole: First I cut away the extra fabric around it, then I pinned and sewed the bias strip to it and finialy sewed the strip around the edge.
---------------
Armloch Einfass: Erst habe ich die Nahtzugabe weggeschnitten, dann das Schrägband angesteckt und angenäht und am Schluss das Band um die Kante gezogen und festgenäht.


Cutting and sewing the shoulder flaps
-------------
Zuschneiden und zusammennähen der Schulterpatten


Pinning the flaps to the armhole and then first sewing it down from the left side and then from the right side and tada the flaps are done ;)
---------------
Die Patten am Armloch feststecken, dann erst von der linken und dann von der rechten Seite festnähen und tada fertig sind die Patten ;)


Adding closure hooks to the bottom of the bodice front and to upper skirtpart front
---------------
Haken ans untere ende des Miederverschlusses und im oberen Bereich des Rockteils anbringen


Side slit seam, done by hand
----------------
Seitenschlitz Naht, von Hand genäht


And then finally attaching the skirtpart to the bodice
----------------
Und schlussendlich den Rockteil am Mieder befestigen


So that's it, my Tauriel traveling cloak is done :D Pictures of the finished cloak will follow shortly, stay tuned ;)
----------------
So das war's, mein Tauriel Reisemantel ist feritg :D Bilder davon in Kürze, also bleibt dran ;)

Sarah

Montag, 26. Januar 2015

Tauriel traveling cloak: closur

UPDATE
I made a newer version for this tutorial on my new blog.
go check it out :) --> filmkostueme.ch/tauriel-traveling-cloak/

 -----------


As announced, here's my post about the lacing closure ;)
-------------
Wie angekündigt, hier mein Post über den Schnürverschluss ;)

I went shopping for a matching satin ribbon and this is what I found:
-------------
Ich habe nach passendem Satinband gesucht und diese beiden gefunden:


I wasn't happy with either of them.... one was to bright green and the other one brown. So I trided to dye the green one. Well that wasn't so easy, I had to use a lot of black and brown acrylic paint with a smal amount of water untill I got a result. 
At first I used to much water and the color wouldn't change at all... 
Below you can see the color bath and the ribbons hanging from a hanger to dry.
--------------
Ich war gar nicht zufrieden mit den beiden... das eine Band war zu leuchtend grün und das andere braun. Also habe ich versucht das grüne dunkler zu färben. War auch etwas schwierig. Schlussendlich habe ich recht viel schwarze und braune Acrylfarbe mit wenig Wasser verwendet um endlich ein Resultat zu bekommen. 
Zuerst habe ich viel zu viel Wasser genommen und die Farbe hat sich gar nicht verändert.... 
Unten seht ihr das Farbbad und die Bänder, die ich zum trocknen an einen Bügel gehängt habe.


And a before/after picture. Still not exactly what I wanted, but much better ;)
-------------
Und ein vorher/nachher Bild. Immernoch nicht ganz so wie ich es wollte, aber viel besser ;)


For the loops I used the same ribbon, only folded in half and sewn together. 
First I pinned it in place and then sewed it on.
-------------
Für die Schleifen habe ich das selbe Satinband verwendet, einfach in die Hälfte gefaltet und zusammen genäht. Erst habe ich die Schleifen festgesteckt und dann angenäht.


And that's my final result....
---------------
Und so sahs dann am ende aus...


......ah well, okey not quite final ;) I didn't really like the result. The ribbon was to wide for my linking, so I sewed it in half as well. Now I'm satisfied with it :) 
-----------------
........okey noch nicht ganz am ende ;) Ich war nicht so zufrieden damit, mir war das Band zu breit, also habe ich es ebenfalls in die Hälfte genäht. Jetzt bin ich ganz zufrieden :)


Next post will be about the shoulder part (edging and flaps)
-------------
Im nächsten Post wirds dann um die Schulterpartie gehen (Einfass und Patten)

See you soon :)

Sarah

Mittwoch, 21. Januar 2015

Tauriel traveling cloak: lining


UPDATE
I made a newer version for this tutorial on my new blog.
go check it out :) --> filmkostueme.ch/tauriel-traveling-cloak/

 -----------


Hello dears :)

todays post is all about the lining of the cloak. I knwo maybe not that exciting, but still pretty important in the costume process
------------
Hallo ihr lieben :)

Heute gehts ums abfüttern des Mantels. Ja ich weiss ist, vielleicht nicht ganz so spannend, aber trotzdem ziemlich wichtig im ganzen Prozess

Here I'm cutting the the facing (I ironed on some light interfacing for the skirt facing and stiffer interfacing for the bodice ones) and the lining fabric.
-------------
Hier schneide ich die Besätze und den Futterstoff zu. (Die Besätze für den Rock habe ich erst mit feiner Klebeeinlage verstärkt und die Besätze fürs Oberteil mit einer stärkeren Einlage)


The complete bodice lining. Before I will sew it to the bodice I will fix the ribbon loops for the lacing closure to it. But there will be a separate post about it soon ;)
--------------
Das fertige Oberteil-Futter. Bevor ich es ans Oberteil nähe, werde ich noch die Satinband-Ösen für den Schnürverschluss dran anbringen. Aber das zeig ich euch dann in einem separaten Post ;)


And the lining for the skirt part. I still have to hand sew the hem facing and then hand sew the lining to it. (I'm halfway there by now ;) )
------------
Und das Futter für den Rockteil. Ich muss noch den Saum von Hand annähen und dann das Futter ebenfalls von Hand einnähen. (Inzwischen habe ich die Hälfte schon geschafft ;) )


The lacing closure is almost done now, so I'll show you soon. Then I'll have to put the skirt together, lining the bodice, fixing the shoulder flaps to the bodice and then putting everything together. I'm very excited on how the finished cloak will look and I'm drawing closer and closer :D
--------------
Der Schnürverschluss ist schon fast fertig, kann ich euch also bald zeigen. Dann den Rock zusammenfügen, das Oberteil fütter, die Schulterpatten anbringen und alles zusammennähen. Ich bin schon so gespannt auf den fertigen Mantel und das wird schon sehr bald der Falls sein :D

Sarah

Montag, 19. Januar 2015

Tauriel traveling cloak: bodice piping and hood


UPDATE
I made a newer version for this tutorial on my new blog.
go check it out :) --> filmkostueme.ch/tauriel-traveling-cloak/

 -----------


As you can see in the picture, there is a thin pipin around the edges of the bodies (also on the hem of it)
----------------
Wie man im Bild sieht hat es eine feine Biese and dein Kanten des Obereils (auch am Saum)


Here I prepare my piping:
-------------
Hier bin ich am vorbereiten der Biesen:


Already pinned to the bodice edges...
---------------
Und schon fest gesteckt an den Oberteilkanten....


And finished :)
---------
Und fertig :)


I also finished the hood. For the lining I used the same fabric, but bleached it some more, so that it's slightly lighter then the rest of the cloak. I think it gives a nice effect :)
-----------
Mit der Kapuze bin ich ebenfalls fertig geworden. Für's Futter habe ich den selben Stoff verwendet, diesen aber noch etwas heller gebleicht. Ich finde das gibt einen schönen Effekt im Vergleich zum restlichen Mantel. :)


Hope you liked my post :) Up next will be the lining...
------------
Hoffe euch hat mein Post gefallen :) Als nächstes kommt dann das Abfüttern des ganzen Mantels...

Sarah